Thursday, April 2, 2009

Making Ribs for the First Time

You may have figured out by now that I am generally an adventurous cook. I like a challenge and I like trying new things, so in many cases, the trickier and more bizarre a recipe is, the more excited I am to give it a try. But there are a few fairly typical things that I have actually never attempted to cook myself. One of those things is ribs. And why not? Rib is a pretty uncomplicated cut of meat, isn’t it? They’re generally seasoned simply and cooked slowly, so there’s little concern about tricky techniques and perfect timing to get a rack of ribs that is cooked to perfection and tastes delicious.

A recipe for ribs in the March issue of Gourmet caught my eye as I was flipping through it. Black Pepper Beef Ribs. Doesn’t that sound amazing? Isn’t your mouth watering? I skimmed through it and found that it was, indeed, a very simple recipe, although it did mention that beef back ribs are usually not found sold separately in grocery stores, so it would probably be necessary to order them for a butcher. That meant two things to me: time and money. Ordering from a butcher probably meant that I would have to wait awhile for them, and there was a good chance they wouldn’t be cheap either. I filed the recipe away in the back of my mind, figuring it was doubtful that I would ever draw it out. It seemed that yet again, an opportunity to finally make ribs myself had slipped away.

About a week later, while I was at the grocery store, guess what caught my eye in the meat section? A lovely shrink-wrapped package of beef back ribs, all long and marbled and just waiting for me to purchase them and gobble them up. It was fate! Or maybe it was just that this particular store sold these ribs separately all the time. They weren’t expensive either, so I really had no excuse not to buy them.

And man, was I ever glad I did. They were incredibly simple to make (actually, maybe a little boringly simple—not exactly a challenge), and they came out beautifully. They were so simple to make, I can explain the process to you in a few simple lines:

1. Mix together two tablespoons of cracked black pepper, one tablespoon of brown sugar, one tablespoon of kosher salt, and one teaspoon of paprika.
2. To make enough for four (I made half that), take two racks (5-6 lbs.) of beef back ribs and pat them dry.
3. Rub the spice mixture all over the ribs, getting it good and worked into the meat. Arrange in a single layer in a large roasting pan.
4. Bake uncovered at 200 F for about six hours.
That’s it! Well, that’s it, other than cutting them up and serving them. They were tender, flavorful, and absolutely fantastic. One suggestion for serving: put them on a platter and have people serve themselves. These ribs are HUGE, so a serving of four or so ribs takes up a whole plate and looks a little ridiculous.

Have fun!

Saturday, March 21, 2009

Book Review: Cooking for Mr. Latte by Amanda Hesser

New York Times food writer, Amanda Hesser’s tale of meeting and marrying a man she calls Mr. Latte is a cross between a novel, an autobiography, a cookbook, and some of the most tantalizing food writing I’ve ever read. Though each chapter can be looked at as a self-contained story, describing an event in the author’s life, always involving food, they collectively chronicle the progression of Hesser’s relationship with her husband, from their meeting to their marriage. At the end of each chapter are a few recipes of the foods described in it.

The reading is light, but the characters are vivid and lovable, and the food is maddeningly tempting to read about. It’s kind of a food-lover’s Sex and the City, only instead of Mr. Big, we have Mr. Latte, and instead of a lot of sex, there is a whole lot of food. As I read, I gorged myself on the descriptions of various dishes and meals, going back to reread passages about salt-crusted shrimp that you eat whole, shell and all, slow-cooked ginger duck, appetizers of foie gras and jam on bread, roasted beet and Vidalia onion salad, braised oxtails, chicken liver pâté, and oh, I could go on. I read a lot of food-writing these days, in the form of blogs, books, and magazines, and I have to say, though I love it, I do get a little sick of it sometimes, and a little desensitized to even some of the most well-written descriptions of food. Not with Hesser’s writing, though. I devoured this book in two days, and could have gone back for seconds.

That said, I did not love every aspect of this book. I found Hesser to be elitist at times, and couldn’t help but be annoyed at certain points in the book. In the fifth chapter, she describes how tiresome it can be to eat at a new restaurant with a group of foodies, yet her own pretentiousness (turning her nose up at Mr. Latte’s suggestion of Merchant’s, an apparently mediocre New York steakhouse, for their first date, for example) would suggest that she is no better. I was a bit put off by how she breezed over her experience of 9/11, focusing more on the food she ate than the impact the tragedy had on her life. If you aren’t going to speak about an event this monumental with any depth, why mention it at all? And I don’t see why in a book about food and love, she devoted nearly an entire chapter to her great drama over buying a Valentino wedding gown on impulse, but then eventually trading it in for a Prada. Who cares?

These really are minor quibbles, though. One has to keep in mind, this is light reading, and it won’t change your life or provoke any heated debates. Hesser never talks about whether or not you should buy organic, or if you should boycott any meat that did not come from a free-range animal. She doesn’t discuss her beliefs on vegetarianism, or foie gras (though she does eat plenty of it). These are all important issues in the world of food, and though I am certain that Hesser has her opinions about them, they simply don’t have a place in this book. Cooking for Mr. Latte is about Hesser’s love for food, about the people she loves, and how the two constantly interact. She reminds us how food can be a comfort and a joy, and how it can be the most vivid part of some of our best memories.

By including recipes, Hesser also allows her readers to literally get a taste of some of the more memorable moments of this part of her life. Though Hesser’s rich knowledge of the culinary world, and occasional pretentiousness about food might seem intimidating, her recipes are completely approachable. Hesser’s stories show how food brings people together, and so these recipes also bring us closer to Hesser and help us to better understand, and perhaps be inspired by, her lifelong passion for food.

Wednesday, March 18, 2009

(A New) Mac and Cheese

There are a number of North American comfort food classics that I think nearly everyone has a favorite version of that they believe is the only “real” version of the meal. Trust me, I’ve seen it: arguments beginning over whether meatballs should be made with beef or pork, fistfights breaking out over whether or not there should be peas in shepherd’s pie, and friendships nearly destroyed over whether or not cream cheese should be added to mashed potatoes.

All right, I may be exaggerating slightly, but I know that even as someone who loves to try new recipes and have plenty of variety in my diet, there are certain foods that I can never quite enjoy as much as when they are made the way I like, the way I grew up eating, the way that I, in my heart of hearts, believe is the “right” way.

One of those foods is macaroni and cheese. I like it baked with breadcrumbs on top. I like it made with a mild cheddar cheese. I like it made with a basic béchamel sauce. There are about a million and one ways to make mac and cheese, but I never liked it better than when it was made in this most simple and basic way. Until now.
The September 2008 issue of Bon Appétit had this fantastic macaroni and cheese recipe that I now can’t get enough of. It’s still fairly simple, and incorporates many of the things that I love about my “original” mac and cheese: the breadcrumb topping is still there, only now it’s in the form of panko sautéed in butter with chopped parsley stirred in; the base of the cheese sauce is still a béchamel, only it is started off with some crisped pancetta and sautéed onion; the cheese is still cheddar, only this time a sharper version is used and combined with parmesan, and—and this is the real key to the brilliance of this dish—mascarpone. The mascarpone helps balance out the sharpness of the cheddar and parmesan, and also adds an incredible richness to the sauce.
The rest is done just as I’ve always done it: combine the sauce with cooked macaroni (shells work well here too), top with the panko, and bake for about thirty minutes.
We had this on a Wednesday night with Caesar salad, and though the macaroni and cheese was not the precise version I had been loving for years, it was true comfort food that I’m sure I’ll love for years to come.
Mac and Cheese with Pancetta
From Bon Appétite, September 2008
Makes 10 servings (I always halve this recipe)

8 tbsp. butter, divided
4 oz. thinly sliced pancetta, coarsely chopped
1 cup finely chopped onion
3/4 tsp. dried crushed red pepper
1 garlic clove, minced
1/4 cup flour
3 1/2 cups (or more) milk
2 1/2 cups coarsely grated sharp cheddar cheese
1 cup finely grated Parmesan cheese
1 8- to 8.8-ounce container mascarpone cheese
1/2 cup chopped Italian parsley
1 lb. orecchiette, or large elbow macaroni

Melt 1 tbsp. butter in large deep skillet over medium-high heat. Add pancetta; sauté until crisp, about 5 minutes. Add onion, sauté until tender, about 5 minutes. Add crushed red pepper and garlic, stir 1 minute. Stir in 3 tbsp. butter, allow to melt, then add flour and stir 1 minute. Gradually whisk in 3 1/2 cups milk, simmer until thick enough to coat spoon thickly, stirring frequently, about 5 minutes. Remove from heat. Whisk in cheeses. Whisk in more milk by 1/4 cupfuls until sauce is thick but pourable. Season with salt and pepper.

Melt 4 tbsp. butter in large nonstick skillet over medium heat. Add panko and stir until very light golden, about 5 minutes. Remove from heat. Stir in parsley.

Preheat oven to 350 F. Lightly butter 13x9x2-inch glass baking dish. Cook pasta in large pot of boiling salted water until just tender but still firm to bite, stirring occasionally. Drain well. Return pasta to pot. Add warm cheese sauce, toss to coat. Season with salt and pepper. Transfer mixture to prepared baking dish. Sprinkle crumb mixture evenly over. Bake until heated through and topping is golden brown, about 30 minutes.

Monday, March 16, 2009

The Joy of Beans

Beans, beans, they’re good for your heart,
The more you eat, the more you …

Oh, all right, I won’t go there. Lucky for you, it is not this negative side effect of eating beans that I wanted to focus on. I was hoping to talk a little more about what I believe are the top three reasons why beans should become a regular part of your diet:

1. They are hella good for you.
2. They are hella cheap.
3. There are about a million and one ways to prepare them, so they can also be hella delicious.

I can understand if you’re not usually a bean kind of person, and that the whole legume family might seem a little bland, and just no match for a decadent steak dinner. Sure, they’re totally different, but if done right, I think they can be equally satisfying. The great thing about beans is that they are so versatile, and lend themselves so well to experimentation.
I made this bean stew using a recipe from a CIA cookbook as a jumping-off point, but changed a few things around to suit my tastes, and to use what I already had on hand.

Start with some diced up veggies—I used carrot, celery, onion, garlic, and tomato—and sauté in some olive oil.
Now, throw in some seasoning. Indian spices pair beautifully with beans, so I used some curry powder and some ground cumin. Stir them in and cook for a minute or two until it’s really aromatic.

Now, add your beans. I used canned garbanzo beans and light red kidney beans, but pinto beans, black beans, and cannellini beans, to name a few options, would all be delicious in here. If you’re using canned beans, don’t forget to drain and rinse first. I also added a chopped red bell pepper and some vegetable stock and brought it up to a simmer.
I covered it and let it simmer for about half an hour. Once you’re ready to serve, taste it and season with salt and pepper. I used very little salt, but quite a bit of pepper. Then, I threw in some chopped parsley, cilantro, and mint. The herbs added a delicious brightness to the dish, definitely worth getting fresh herbs for.

I served the stew with rice seasoned with lemon and cilantro, and it was a delicious, nutritious, completely satisfying and inexpensive meal.


Three Bean Stew
Adapted from the Culinary Institute of America’s From Our Kitchens
Serves 4

2 tsp. olive oil
2 cloves garlic, minced
1 small onion, finely chopped
1 celery stalk, diced
2 medium carrots, diced
2 plum tomatoes, peeled, seeded, and chopped (use canned when tomatoes are out of season)
1 tbsp. curry powder
1 tsp. ground cumin
1 cup canned kidney beans (drained and rinsed), or dried (cooked and drained)
1 cup canned garbanzo beans (drained and rinsed), or dried (cooked and drained)
1 cup vegetable broth
1 cup diced bell pepper
1 tbsp. chopped fresh parsley
1 tbsp. chopped fresh cilantro
1 tbsp. chopped fresh mint
Salt and pepper to taste

Heat oil in a large, deep skillet over medium heat. Add the garlic, onion, celery, and carrots and sauté, stirring from time to time, until onion is light golden, about 5 to 6 minutes.

Add tomatoes and sauté for 2 to 3 minutes. Add curry and cumin and sauté 2 minutes.

Add beans, broth, and bell pepper. Increase heat to high and bring liquid to a boil. Reduce heat to low, cover, and simmer gently for about 30 minutes. Check occasionally and extra broth if necessary to keep the stew moist.

Stir in parley, cilantro, and mint. Add salt and pepper to taste and serve.

Thursday, February 26, 2009

How to Prepare a Steak Dinner

1. Forget everything you’ve ever learned about healthy eating (temporarily) before proceeding. Otherwise, you’re just wasting your time.

2. Buy a couple of lovely red steaks (I chose sirloin), organic, if possible (OK, maybe don’t forget everything you’ve ever learned about healthy eating). Rub them down with Montreal steak spice.
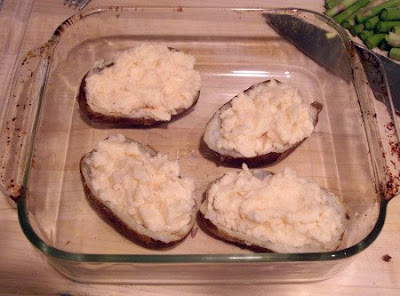
3. Come up with some kind of a potato side—you need to have potatoes with steak. Almost anything will do: French fries, roasted wedges, or good old-fashioned baked potatoes with sour cream and butter. I did twice-baked potatoes from here: http://www.epicurious.com/recipes/food/views/Twice-Baked-Potato-Cups-with-Caramelized-Shallots-107319
4. Come up with some kind of vegetable side. Yes, vegetables are necessary, but preferably covered in butter and/or cheese. Green beans and peas are both good options. I did roasted asparagus, tossed with garlic, olive oil, salt, and pepper, and then covered in Parmesan.5. Decide on a cooking method: an outdoor grill is always preferable for steak, but if you’re like me and you don’t have one, a cast-iron skillet is the next best thing. Drizzle some vegetable oil in there and get it really hot—just shy of smoking. Then, your steaks go on there for about three to four minutes per side for ¾”-thick steaks for medium doneness. They will smoke—just turn on the fan, open the window, and let it do its thing.

6. Serve up each steak with a generous helping of vegetables and potatoes. Don’t be shy—your diners will thank you for it.
7. Pour glasses of a nice Cabernet Sauvignon, and dig in!

8. If the high fat, carbohydrate, and red meat content of the meal cause feelings of guilt, please refer to rule #1.

Sunday, February 22, 2009

Root Vegetable Pie with Rosemary Biscuit Topping (a vegetarian Sunday night dinner)

I’ll admit it: I am an omnivore through and through and to me, there is nothing like popping a tender morsel of slowly stewed beef into my mouth on a cold winter evening. That said, this pie, which is actually more like a stew, is the epitome of winter comfort food, with savory root vegetables baked in a creamy sauce and topped with steaming rosemary biscuits. It certainly hits the spot.

Speaking of beef stew, I only just realized that my previous post never actually included the recipe for the beef stew. I apologize from the bottom of my heart, and have edited the post to include the important recipe. It will never happen again. Probably.

Now, on to yummier things: when I saw this recipe in the March issue of Bon Appétit magazine, my eyes were immediately drawn to the tempting photograph of golden rosemary biscuits blossoming out of a baking dish. I knew I would be making this recipe in the near future, and I did, with great success. Well, great success despite some ambiguous instructions on BA’s part. This recipe isn’t particularly complicated, but it certainly isn’t as simple as the beef stew recipe, and then it doesn’t help that BA has a tendency to be a little vague with their instructions. I’ll get to that.

First, let’s get our ingredients together: vegetarian bouillon base (I love the Better Than Bouillon brand—I’ve only tried their vegetarian one, but it’s really wonderful), carrots, celery root, parsnips, rutabaga, turnip, dried porcini mushrooms, butter, onion, garlic, rosemary, flour, cream, dry Sherry, and parsley. Got it? Good.Now, prepare your vegetable bouillon, and simmer your vegetables and mushrooms in it for about seven minutes.Here’s where I nearly blew it: once your veggies are tender, you drain them, BUT you also want to reserve the bouillon, so don’t drain it into the sink! Do it over a bowl or another pot—you want to hang on to both your veggies and the bouillon they were simmered in.

Now, melt the butter in the pot and sauté the onion in it until it begins to brown.
Mix in the garlic and rosemary, and stir it for a couple of minutes. Then, stir in the flour and let it cook for another minute.Still have your broth? Good. Whisk it in, and then whisk in the cream and the Sherry. Cook until the sauce thickens and reduces, whisking from time to time.Mix the vegetables and the parsley in, season to taste with salt and pepper …
…and transfer to a buttered baking dish.Now, you’re ready to start baking, and to also start being confused by BA’s directions. So, here’s the deal: BA says to bake at 400 F for 50 minutes. Then, it moves on to the directions for the biscuits, which are to prepare the batter, and then drop the dough by spoonfuls onto the hot pie filling. Then, you bake it for 45 minutes. So, does that mean to bake the filling for 50 minutes, and then another 45 after the biscuit topping has been added? Or do they want us to add the biscuit dough five minutes after starting the filling, and bake it for a total of 50 minutes? I’m thinking the former, since it seems a little ridiculous to put the filling in the oven for five minutes, and then pull it out to add the biscuits, and then pop it back in for 45. However, it also seems a little ridiculous to me to bake a pie for almost two hours when everything in it (other than the topping) is already cooked. So what to do? The magazine didn’t contain any answers, so here’s what I did …

I popped the filling into the oven for about twenty minutes at 400 F. Meanwhile, I worked on the biscuit batter.After that twenty minutes, the filling looked like this:I decided it was biscuit time. So the biscuit dough was dropped onto the filling by tablespoonfuls.
Then, back into the oven it all went for another 45 minutes, and you know what? It turned out great. The filling was hot, thick, and creamy; the biscuits were golden on the outside, and hot and fluffy on the inside.
Maybe BA wanted me to bake the pie for the entire 95 minutes, but 65 worked out perfectly for me. Try it yourself and let me know what you think. The recipe is available online.

Monday, February 16, 2009

Simple, Savory, Sensational Sunday Night Stew

While I was growing up, Sunday night always meant something special in my household. It was the night when no one had soccer, Girl Guides, meetings, work, or school, and my Mom, Dad, sister, and myself would all sit down together for a family meal. Being the foodie that I am, I looked forward to these meals all week. My Mom cooks good food every night, but there are few dishes that inspire such feelings of comfort and delight like those Sunday night meals: perfectly roasted chicken with buttery peas and mashed potatoes, juicy roast beef with horseradish and Yorkshire puddings, pork roast with cranberry and peppercorn gravy and roasted potatoes, and, sometimes, beef stew with thyme dumplings. They were all my favorites, but now that I have actually made all of these myself, I have to say that beef stew is the easiest to get just right.
First, you want to start with the best ingredients, of course. I got some amazing organic stewing beef from Whole Foods, and it wasn’t too expensive since stewing meat is one of the cheaper cuts. You only need a few more ingredients: onions, carrots, peas, garlic, thyme, a bay leaf, tomato paste, vinegar, sugar, flour, salt, and pepper.Next, put the beef into a paper bag with the flour, salt, and pepper and shake it up to coat the meat.
Then, your meat goes into the bottom of a casserole dish.All the vegetables except for the peas go over that.In a separate bowl, combine the water, tomato paste, vinegar, sugar, thyme, garlic, and bay leaf, and then pour it over the meat and vegetables in the casserole.
Cover it all up, and stick it in the oven for two hours at 350 F.About halfway through, take it out and give it a stir. How good does that look?
Meanwhile, you can get going on your dumplings. Actually, about ten minutes before the two hours is up, you can get going on your dumplings. They’re not exactly complicated. You’ll need flour, baking powder, dried thyme (rosemary works too), salt, egg, and milk.
Combine the dry ingredients in a medium bowl, and the wet ingredients in another, and then stir the wet into the dry.

After the two hours are up, stir in the frozen peas, and then drop the dumpling batter by rounded tablespoons onto the stew.Cover it up and bake another 20 minutes. Pull it out, and it should look like this:
Serve the stew in shallow bowls with a of couple dumplings on top.
Take a bite and you’ll be transported back to the warmest kitchen you’ve ever visited, the most loving dinner table you’ve ever sat at, and the most welcoming company you’ve ever been surrounded by.

Happy eating!

Oven-Baked Stew with Dumplings
From my Mom--Serves 6

Stew:
1/4 cup all-purpose flour
2 tsp. salt
1/8 tsp. pepper
1 1/2 lbs. stewing beef, cut into 1" cubes
3-4 medium carrots, cut into 2 " strips
4 small onions, quartered
2 cups water
1 6 oz. can tomato paste
1 tbsp. white vinegar
1 tsp. sugar
1/8 tsp. dried thyme
1 clove garlic
1 bay leaf
1 10 oz. package frozen peas

Dumplings:
1 cup all-purpose flour
2 tsp. baking powder
1 1/2 tsp. dried thyme (you can use rosemary also)
1/2 tsp. salt
1 egg
1/2 cup milk

Preheat oven to 350 F. In a paper or plastic bag combine flour, salt, and pepper. Add cubes of beef 1/4 at a time, and shake to coat. Place beef in a 2 1/2 to 3-quart baking dish. Add carrots and onions. In a bowl, combine water, tomato paste, sugar, thyme, garlic, and bay leaf. Pour over meat. Cover and bake for 2 hours.

Meanwhile, combine the first four ingredients of the dumplings in a small bowl. In a separate bowl, beat egg and milk. Stir egg mixture into the flour mixture until just blended.

When the two hours are up, remove the stew from the oven and stir in the frozen peas. Drop the dumplings by rounded tablespoonfuls onto the stew. Cover and bake another 15-20 minutes, until the dumplings are done.